How to fix a dripping tap comes down to one worn part. Turn off the water, open the tap up, and swap that part. On older taps the culprit is a rubber washer. On quarter-turn and lever taps it is a ceramic cartridge.
WaterSafe, the register of approved plumbers, puts the waste in plain numbers. One dripping tap can waste up to 5,500 litres of water a year. On a meter, that water lands straight on your bill. A dripping hot tap also wastes the energy used to heat it.
This guide walks through both repairs, washer first, then cartridge. It also covers the smaller O-ring fix for leaks round the spout. Clear stop points tell you where the job stops being DIY. Everything here uses basic tools and parts from any DIY shop.
Key Takeaways
Short on time? These are the points that matter most.
- Most drips come from one worn washer or cartridge.
- Turn the water off before you open any tap.
- Take the old part to the shop for an exact match.
- Never force a tap shut to stop a drip.
- Corroded fittings and seized valves mean a plumber, not force.
Find the Leak First: Which Part Has Failed?
Where the water escapes tells you which part has failed. A drip from the spout points to the seal inside the tap. Water round the spout base or handle points somewhere else entirely. Five quiet minutes of watching saves an hour of wrong repairs.
A leaking tap that drips from the spout has a worn seal. On a traditional tap, that seal is the washer. On a modern tap, it is the ceramic cartridge. The table below matches each symptom to its likely cause.
| What you see | Likely cause | The fix |
|---|---|---|
| Drips from the spout, tap turns several times | Worn rubber washer | Change the washer |
| Drips from the spout, quarter-turn or lever tap | Worn ceramic cartridge | Swap the cartridge |
| Water round the spout base or under the handle | Worn O-ring | Change the O-ring |
| Water pooling under the sink | Leaking connector or valve | Call a plumber |
What You Need Before You Start
Every tool used in how to fix a dripping tap is basic. Nothing here needs hiring, charging or specialist kit. Lay everything out before the water goes off. A towel under the work area catches drips and rolling screws.
- Adjustable spanner
- Flat and cross-head screwdrivers
- Allen keys, for grub screws on modern taps
- Replacement washer, cartridge or O-rings
- Cloth or old towel, plus the sink plug
- Silicone grease, for O-rings and spouts
Buy the part after the tap is apart, not before. Take the old washer or cartridge to the shop with you. Sizes vary between makes, and an exact match matters. A washer one size out can drip just as badly.
Turn the Water Off and Drain the Tap
Look under the sink or basin for an isolation valve. It is a small slotted fitting on the pipe feeding the tap. Turn the slot with a flat screwdriver until it sits across the pipe. Across means closed, in line means open.
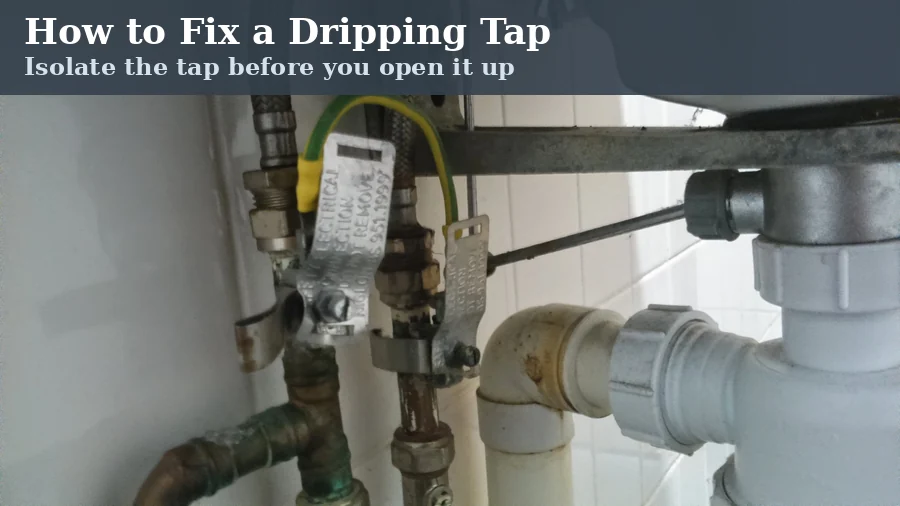
No valve? Use the main stopcock instead. It usually sits under the kitchen sink, where the supply enters. Turn it clockwise until it stops, without forcing it. Then open the tap fully and let it drain dry.
Put the plug in, or lay a cloth over the plughole. Washers, screws and O-rings are small, shiny and keen to escape. Keep the parts in order as they come off. A phone photo of each stage helps reassembly later.
Change the Washer: The Classic Repair, Step by Step
A washer tap turns several times between open and closed. That long travel is the clue you have washers inside. This swap is the heart of how to fix a dripping tap. Changing it takes most people under an hour.
- Prise off the cap on top of the handle.
- Undo the screw beneath it and lift the handle clear.
- Unscrew any metal cover to expose the brass headgear.
- Grip the tap body firmly so it cannot twist.
- Unscrew the headgear anti-clockwise with the spanner.
- Lift the mechanism out and find the washer underneath.
- Remove the old washer, undoing its small nut if fitted.
- Push the new washer on flat, centred and fully seated.
- Screw the headgear back in, firm but never forced.
- Refit the handle, turn the water on, and test.
While the mechanism is out, glance at its other seals. Perished O-rings on the spindle are cheap to change now. Forcing the tap shut each night crushes washers early. A gentle close protects the new washer you just fitted.
How to Fix a Dripping Tap With a Ceramic Cartridge
Modern taps turn a quarter of the way, or lift on a lever. Inside sits a ceramic disc cartridge instead of a washer. The two discs slide over each other to seal. Once they wear or scale up, the tap drips.
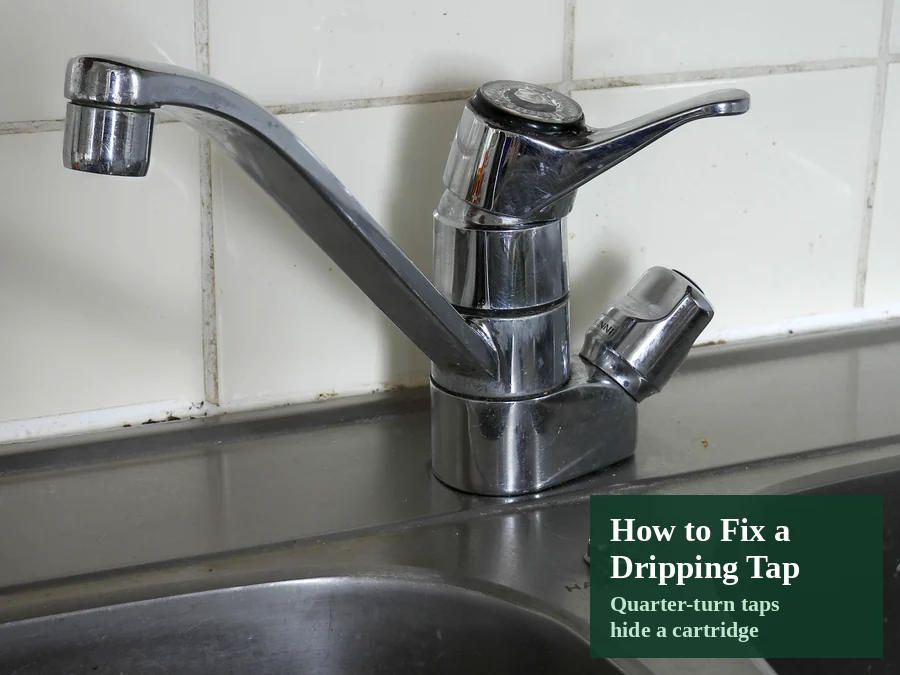
Start the same way: water off, tap drained, plug in. Prise off the handle cap and undo the screw or grub screw. Lift the handle away, then unscrew the metal shroud beneath. The cartridge lifts out once its retaining nut is undone.
Cartridges are not one-size-fits-all parts. They vary by make, size and fitting pattern. Take the old one to a plumbers’ merchant for its twin. Refit in reverse order, then test with the water back on.
Water Round the Spout? The O-Ring Is the Suspect
Some taps leak around the base of the spout instead. That wet ring means the O-ring seal has worn or cracked. The spout seals to the body with one or two O-rings. They cost pennies and take minutes to change.
Loosen the small grub screw at the back of the spout. Lift the spout straight up and off the body. Hook the old O-rings off and roll the new ones on. A smear of silicone grease helps the spout turn smoothly.
Still Dripping After the Repair? Read This First
A new washer cannot seal against a damaged tap seat. The seat is the metal ring the washer presses onto. Years of drips and grit can pit or score its face. Run a clean fingertip over it: rough means trouble.
A reseating tool grinds the seat smooth again at home. It is a cheap tool, widely sold in DIY shops. Heavy pitting, though, is a plumber job with proper cutters. On an old tap, a replacement tap often beats repeated repairs.
Limescale causes the same grief inside ceramic cartridges. Hard water areas scale discs and aerators faster. Wipe the spout outlet weekly to slow the build-up. Left for months, that damp feeds mould, like the growth our condensation guide tackles.
Where DIY Stops: Call a Plumber Instead
Some tap jobs cross the line out of basic DIY. Stop and call a plumber if any of these apply. Brass fittings that crumble or will not budge count double. Force turns a small repair into a flooded kitchen.
- There is no isolation valve, and the stopcock is seized shut
- Fittings are corroded, cracked or crumbling as you touch them
- Water is coming from pipework or connectors under the sink
- The repair means opening a boiler or pressurised heating parts
- Anything involves gas or electrics, which are never DIY territory
Never open a combi boiler or touch its internal pipework. Pressurised systems store energy and can scald badly. Gas work is legally restricted to registered engineers. The WaterSafe register lists approved plumbers and plain advice on leaks.
A Quiet Tap Tonight, and Smaller Bills All Year
You now know how to fix a dripping tap at home. One worn part, basic tools and a careful hour covers most taps. The silence afterwards is its own reward each night. The saved water is the quieter, bigger win.
Keep going while the toolkit is out and confidence is high. Our guide to bleeding a radiator takes ten minutes per radiator. Bigger jobs can wait for our home improvement ideas on a budget list. Browse the whole Home Improvement archive for the next weekend project.
Frequently Asked Questions
How long does it take to fix a dripping tap?
Most washer or cartridge swaps take between thirty minutes and one hour. That includes isolating the water, draining the tap and testing afterwards. A first attempt runs longer than a second one. Seized covers or stiff headgear add the most time.
What size washer does my tap need?
There is no single standard size across all taps. Washer sizes vary by tap make, model and age. Take the old washer to the shop and match it exactly. A near match looks right but still lets water past.
Why does my tap still drip after a new washer?
The usual cause is a pitted or scored tap seat. A fresh washer cannot seal against rough metal. Limescale left inside the tap can also hold the seal open. A reseating tool fixes light damage; deep pitting needs a plumber.
Can I fix a dripping mixer tap myself?
Yes, most mixer taps are fair game for careful DIY. They use a ceramic cartridge rather than a washer. Isolate both supplies, swap the cartridge for an exact match, then test. Stop if fittings crumble or nothing will budge.
How much water does a dripping tap waste?
WaterSafe warns that one dripping tap can waste up to 5,500 litres yearly. Hot taps waste heated water too, so energy goes with it. On a meter, every wasted litre is billed water. Fixing the drip is the cheapest saving in the house.
When should I call a plumber about a dripping tap?
Call one when the water cannot be isolated safely. Corroded fittings, leaks under the sink and seized valves also qualify. So does any job touching a boiler, gas or electrics. A good plumber fixes in one visit what force makes worse.